

How to set up a Bullet Journal in 10 minutes.
Quickly create your own personalised productivity system

If you are new to the Bullet Journaling Method, you are advised to start with the essential components of the Key, Index, and ‘Collections’—Future Log, Monthly Log, and Daily Log—to avoid cognitive overload and to see what you are letting into your life. (BTW, I have used a dotted notebook in figure graphics - a plain or ruled notebook would work as well)
Step 1 The Key
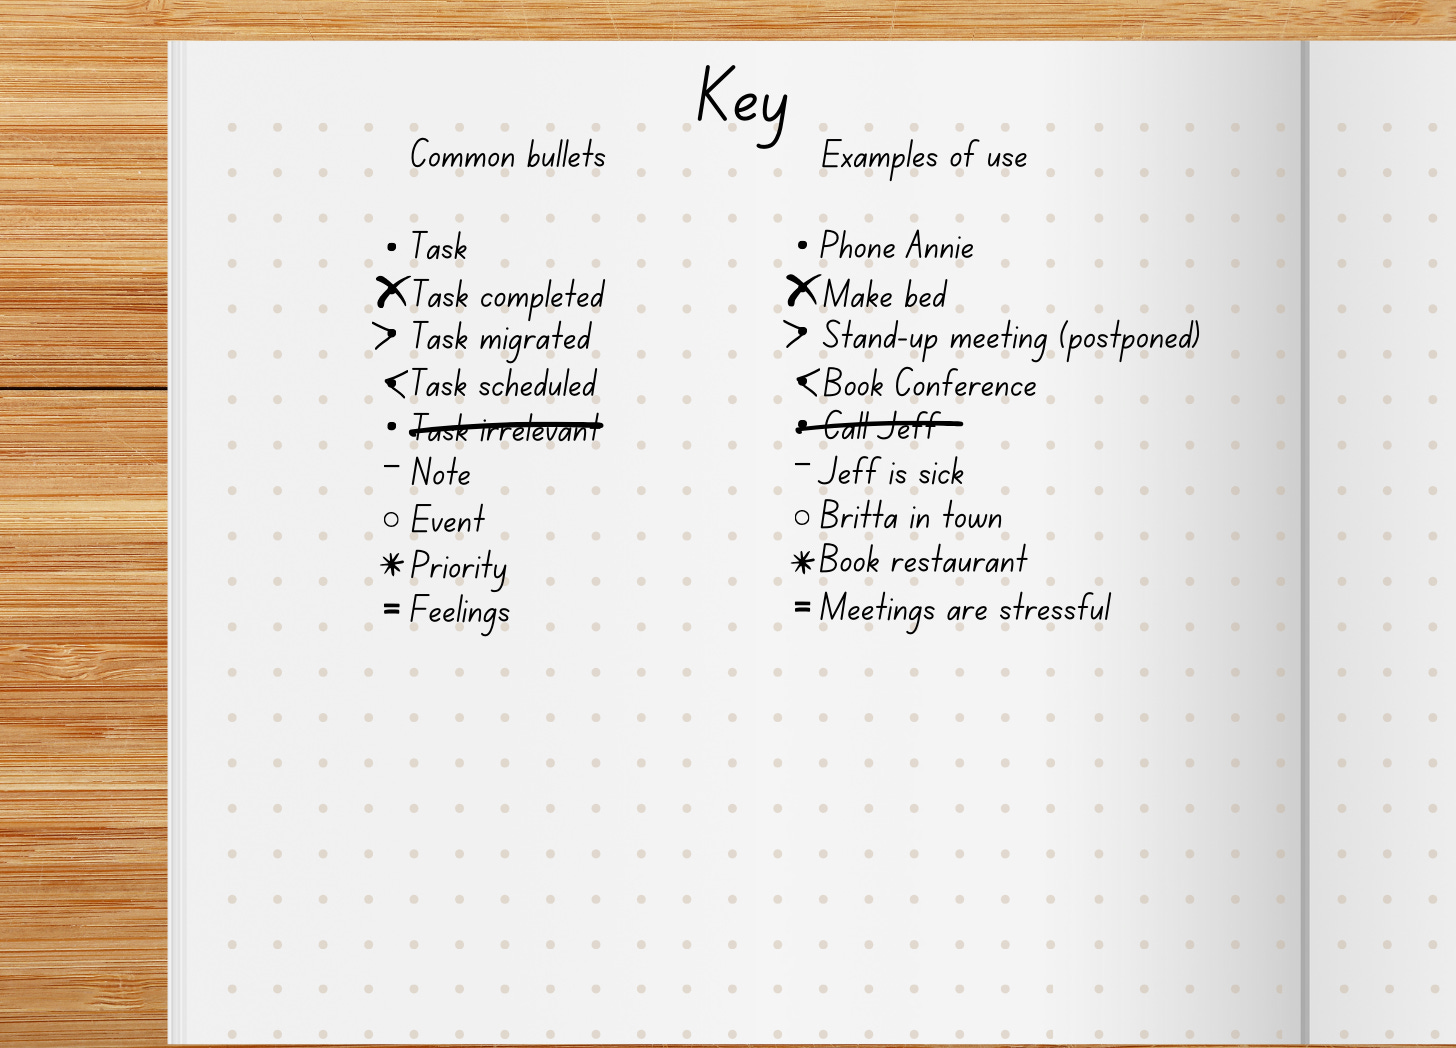
The figure above shows the most common symbols (bullet points!) used in Bullet Journaling:
1. Tasks: Represented by a dot (
•). This signifies a task that needs to be done.2. Events: Represented by a circle (
○). Used for events or appointments.3. Notes: Represented by a dash (
–). Notes provide additional information or ideas that don’t require action.4. Feelings: Represented by an equal sign (=)
Modified symbols or signifiers.
5. Completed Task: Represented by an
Xover the dot. This shows the task has been completed.6. Migrated Task: Represented by a
>over the dot, indicating that the task has been moved to a future date.7. Scheduled Task: Represented by a
<over the dot, indicating the task has been scheduled or deferred.8. Priorities: Represented by an asterisk (
*) or an exclamation mark (!). These symbols mark high-priority tasks or important items.9. Inspiration or Ideas: Represented by an eye symbol or a lightbulb icon to highlight creative ideas or inspiration.
It is useful to have these bullets and signifiers listed somewhere accessible to refer to, like at the beginning of your notebook or on a sticky note that flaps out so you can always see them.
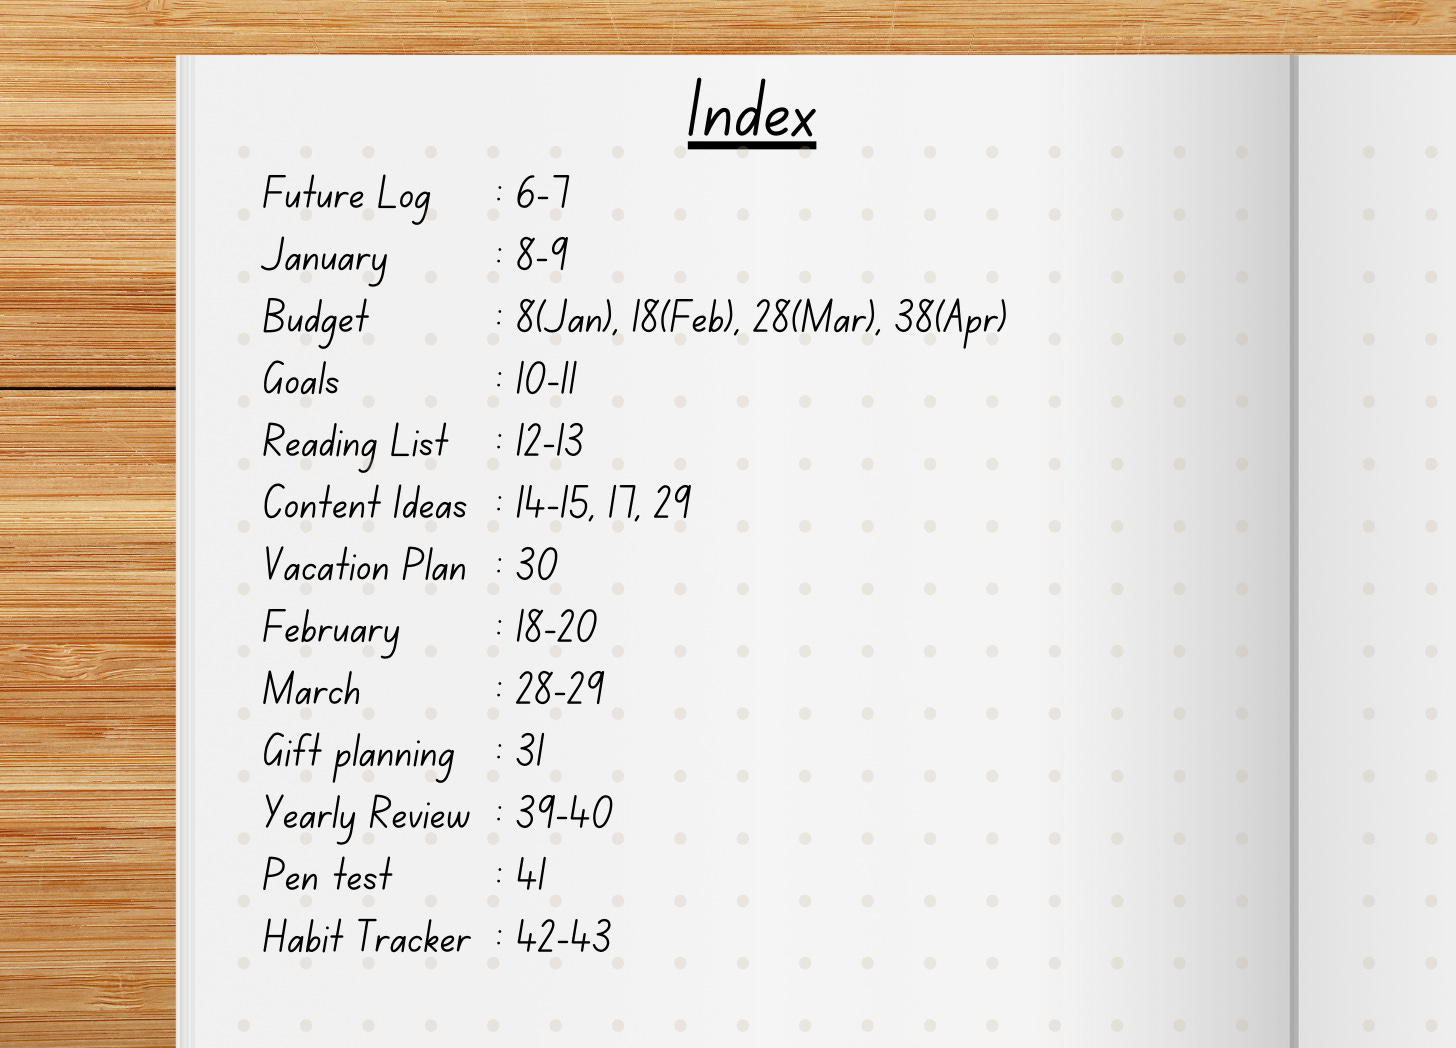
Step 2: Create the Index Page at the beginning of your book. Make sure each page of your journal has a page number; if not, add a number to each page so you can locate your Collections. Once you create a Collection, remember to add it to your Index. Updating your Index could be part of your weekly or monthly review.
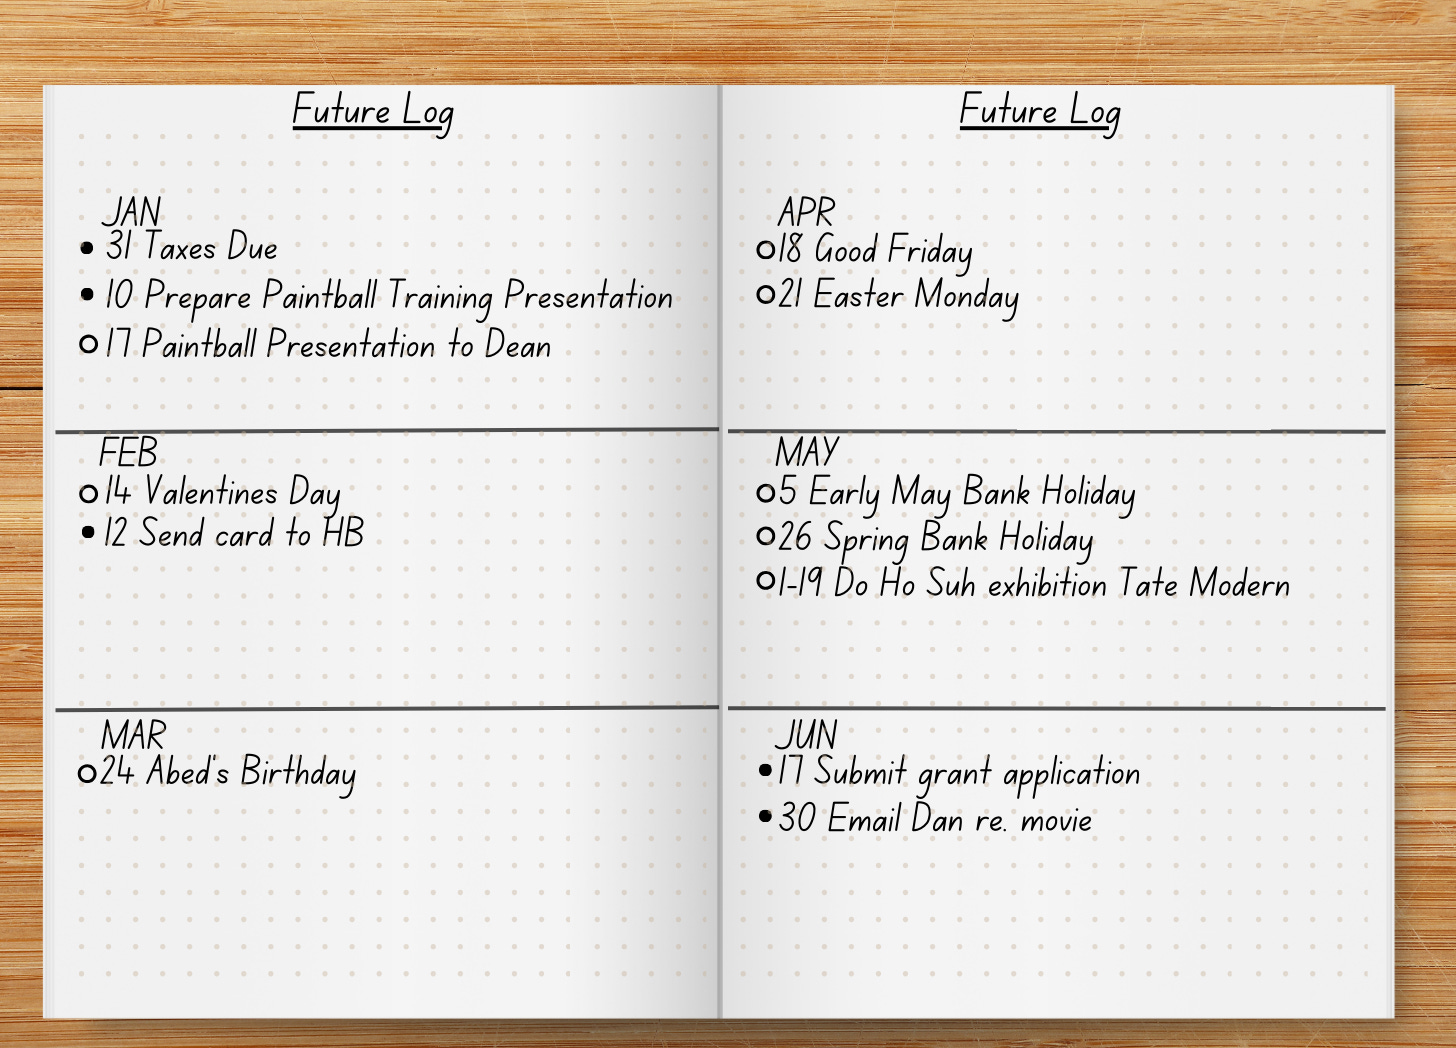
Step 3: The Future Log captures tasks and events scheduled months in advance. You can plan your future log as far ahead as needed, e.g., six months, eight months, or a year.
Step 4: The Monthly Log gives an overview of the current month and could be considered part timeline and part task list.
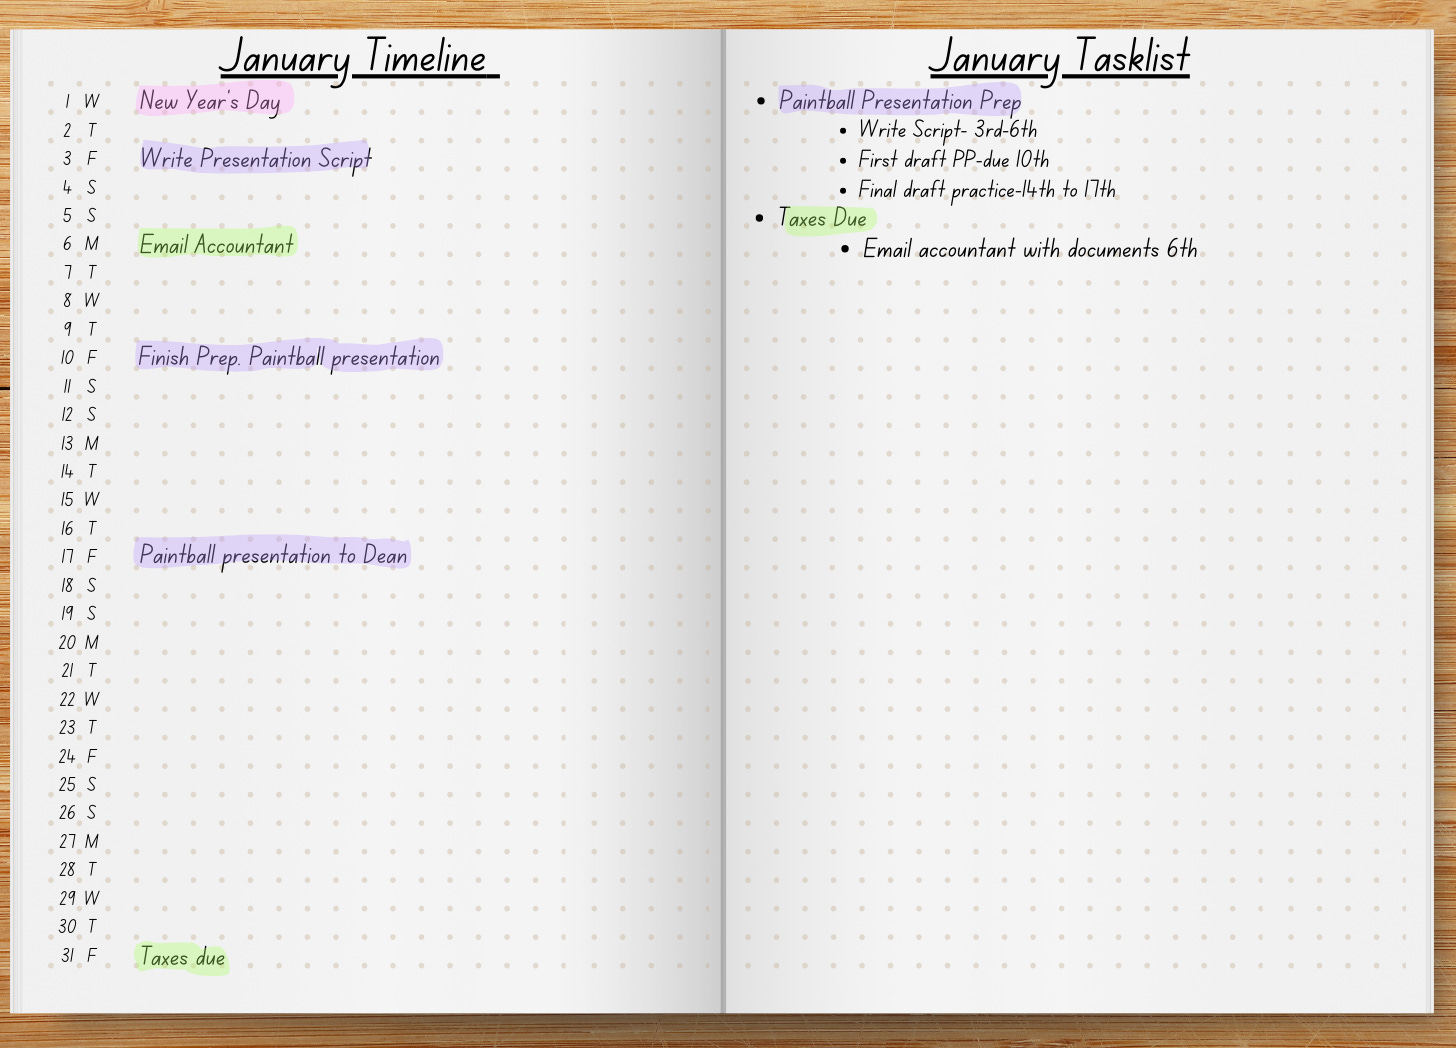
On the left page is the timeline, which can be used to add upcoming commitments.
Your monthly task list is on the right page. It’s designed to help you organize and prioritize your monthly tasks, including new tasks, future log items scheduled for this month, and any unfinished tasks from the previous month.
I have also used highlighters to categorize tasks into Bank holidays (pink), Work (purple), and Admin (green). This is just a personal preference and is an example of how to personalize the system for yourself.
The recommended way to also use it is to log events soon after they’ve happened. Providing an accurate record of your life!
Step 5 The Daily Log
This is where you record daily tasks, events, and notes. You write the date and log your thoughts using the rapid logging technique and referring to the key.
Rapid logging
The fundamental processing of thoughts in a Bullet Journal is through daily rapid logging, which involves breaking down thoughts, tasks, and events into quick, concise, bulleted entries. It is important to keep these notes concise as you can then refer back to them to track tasks, notes, and events you want to remember.
These entries are typically divided into three main types: tasks (denoted with a dot), events (marked with a circle), and notes (represented by a dash). An additional optional bullet is for feelings (denoted by an equal sign). This simple, coded format allows for quick organization and tracking, which is where bullet journaling gets its name.
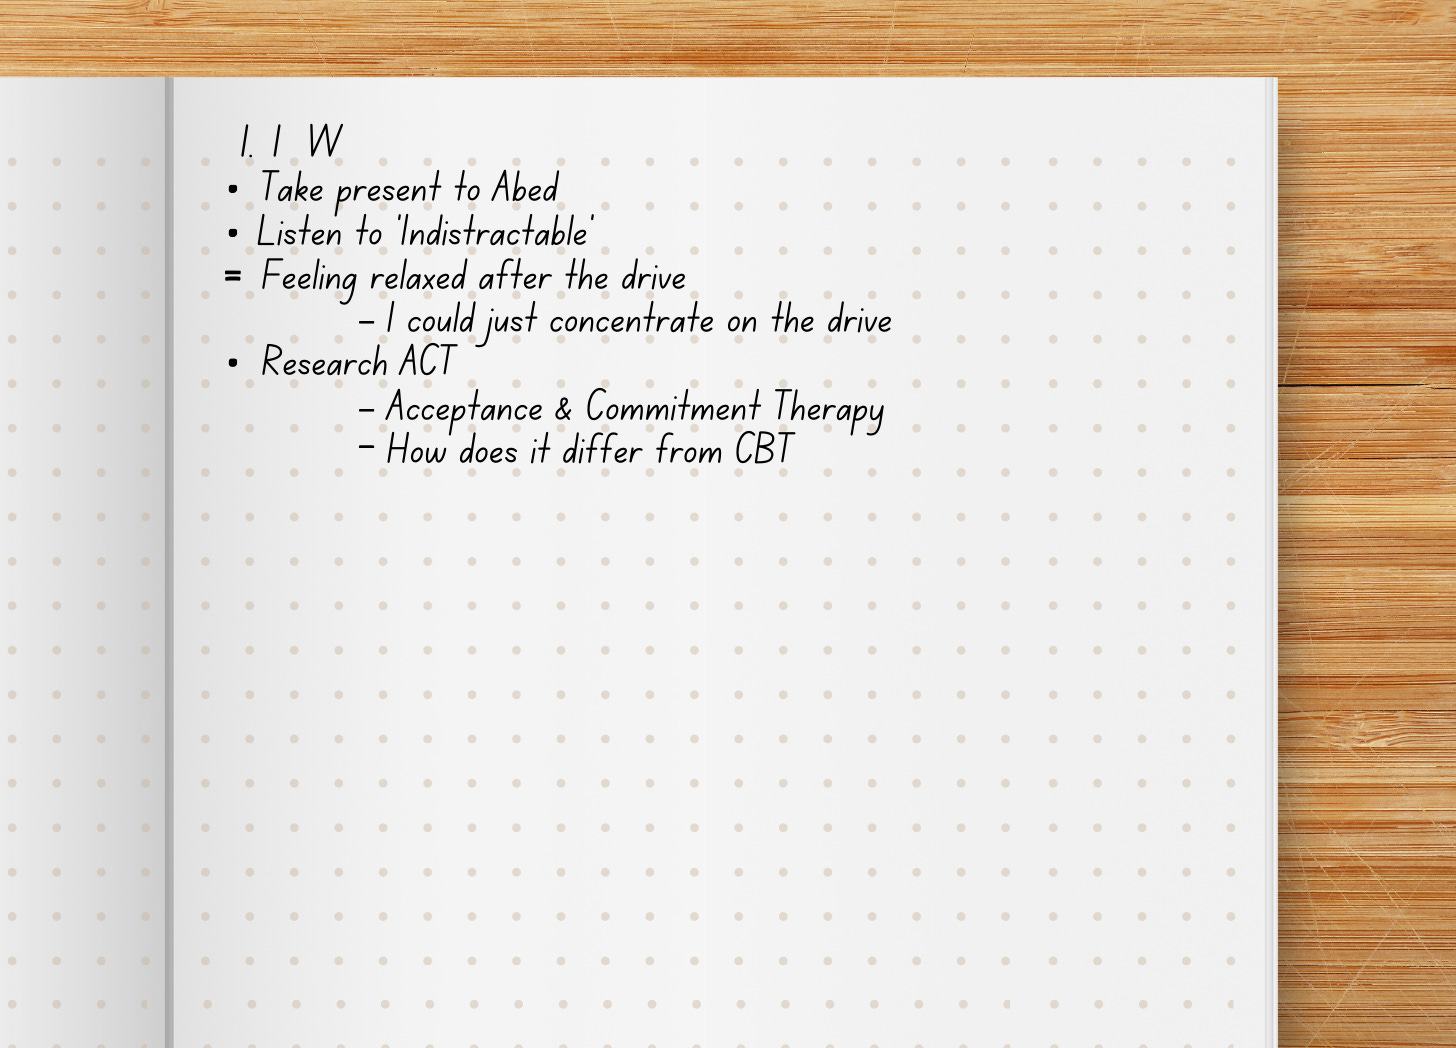
You can then use signifiers to show the status of the tasks. As tasks are completed, prioritized, or moved forward, you add symbols to mark them off, highlight them, migrate them, or cancel them, creating a real-time log of progress, as shown in the example Daily Log image below.
You did it! 🎉 You now have a fully set up bullet journal to put all your tasks, notes, and feelings in.
Over time, as you become more comfortable, you can add personalized “collections” tailored to specific projects, goals, habits, or interests. Many find it helpful to experiment with various formats, symbols, or even aesthetic additions, which can improve your engagement through personalization; in other words, you’re more likely to use the Bullet Journal if it is fun for you! The collections don’t have to be sequential, and you can add to your collections anywhere in your notebook, but they should be easy to find because of the Index.
This is part 1 of how to set up a Bullet Journal. The second part will come later this week and will show you how to use the weekly and monthly reviews to process your thoughts and tasks. I’ll post the link here once it is published.
Please feel free to get in touch and let me know your thoughts on the process of setting up your own Bullet Journal. Is there anything I can clarify?
Are there any other productivity methods you want me to summarize or are confused about?
Exciting stuff
You’re a good writer.
Functional, clear, concise. A true PhD.
May I ask where you got this journal in the photos? God knows— I need another.